

 (1 Rates)
 Tutorial Coming Soon
By: Add your name here!
Have a bit of spare time?
Can you make an awesome tutorial for this page?
Dab hand with a video or camera?
Then you're just the kind of person we need to help us make this site a great resource for the PowerBocking community.
If you want to claim this page and become a PJF contributor then please contact me via pm - Thank you :)
(1 Rates)
Spring Inner Tube & Tape Mod
By: SNuD
The spring of your Jumping Stilts needs to be protected as much as possible and this simple modification can help lenghten the life of your spring. This mod uses inner tubes to add a protective layer & towards the bottom of the tutorial is some pictures of bockers using additional tape to make their mod more unique.
There are lots of discussion threads throughout the forum about this very topic some of which can be found here, here, here, here and here!
MATERIALS NEEDED:
2 bicycle inner tubes - (Mountain bike 26” x 2” are very good - Old ones with punctures are fine)
A pair of scissors.
Roll of duck tape or similar.
INSTRUCTIONS:
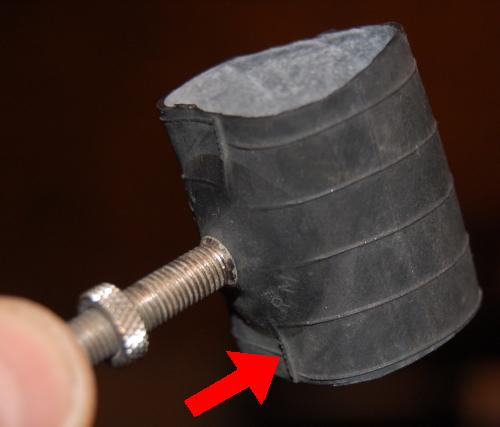
1. Find the valve and cut through the tube about 2cm either side of the valve.

2. Look for an inner seem line that runs near or through the valve.
3. Using this seem as a guide, cut length wise along the tube
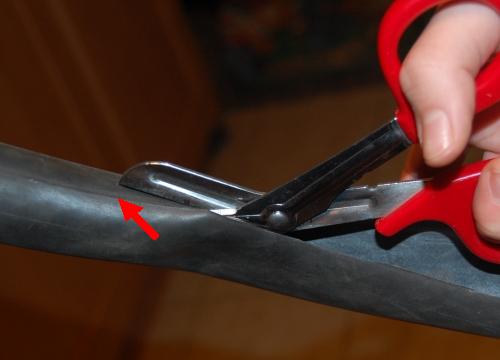
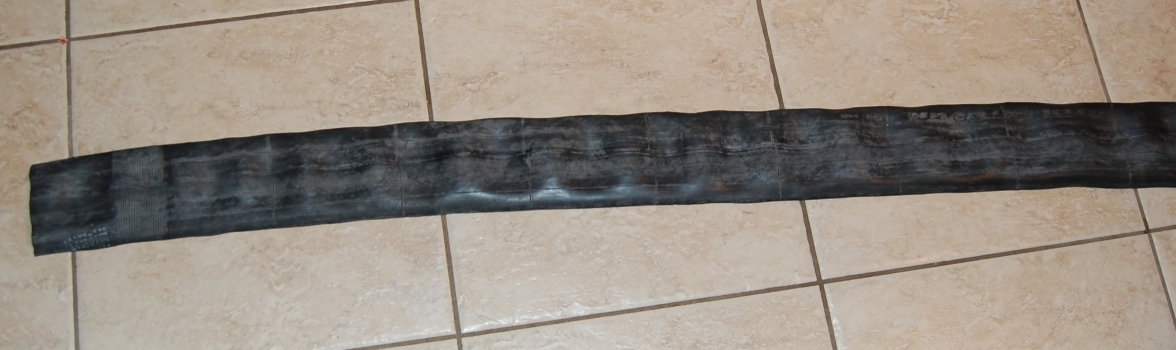
4. You will end up with a long strip of rubber.
It’s a good idea to clean it at this stage, trying to get as much of the chalk off it as you can. Soapy water or a cloth soaked in Mentholated spirits works quite well.
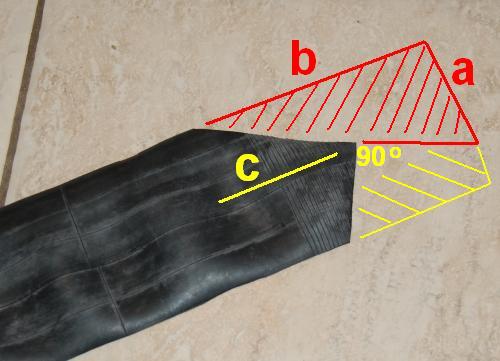
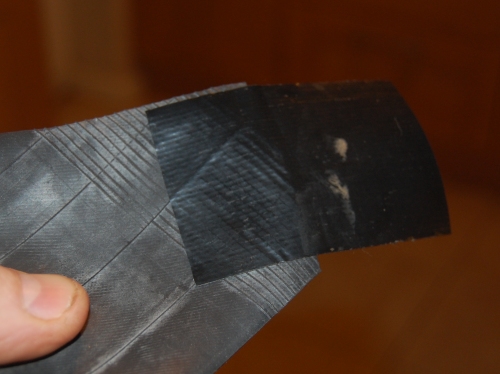
5. For a neat start, measure just over half way across (a) and mark the end of the rubber.
Now multiply that by 1.5 and put another mark along the edge (b).
Cut a straight line between them cutting off the red triangle.
Cut off the yellow area from the centre line (c).
6. Add a short piece of duck tape to the outside of the tube where the yellow bit was!
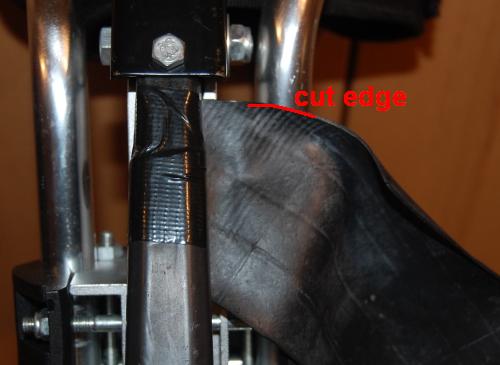
7. Stick the end of the rubber behind the top of the spring with the tape coming around the front.
Keep the red cut edge horizontal.
Always start at the top as the edges of the wraps will then be protected from most impacts.
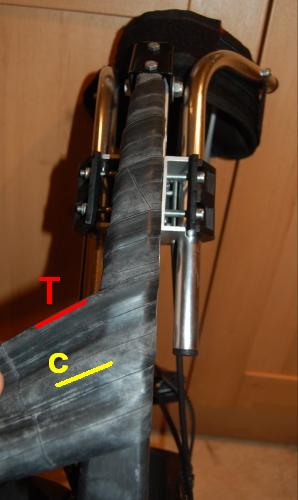
8. Keeping the rubber tight wind around, spiralling down the spring aligning the top (red T) with the centre of the layer beneath (yellow C). Thus you get 2 layers of rubber all the way down.
9. At the bottom, cut the rubber off horizontally.
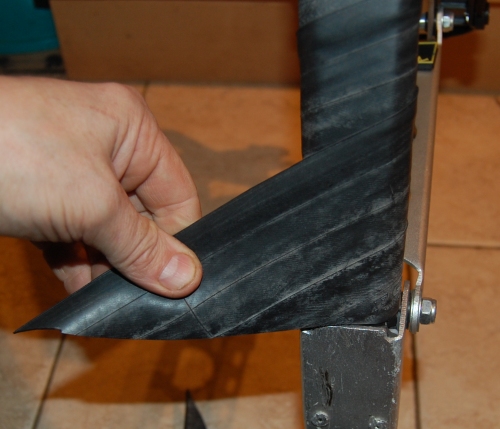
10. Secure the bottom with 2 to 3 wraps of duck tape - And thats it you're done!
Below are some images of Bockers who were a bit creative with their tape modifications. After the above steps or insted of them, some people also wrap their springs with 3 - 5 layers of additional coloured duct or electrical tape

.
* Disclaimer
Any modifications, setting up guides, advice and tutorials found on the Pro-Jump Forum should only be followed at your own risk. Pro-Jump / UK Good Deals Ltd will not be held responsible for any injury, loss or damage of any nature. Some modifications provided on the forum may also invalidate your jumping stilts warranty so please check the terms and conditions on the Pro-Jump.co.uk site or the site where your jumping stilts were purchased from.
By following any of the advice set out on the Pro-Jump Forum you are exonerating the company (Pro-Jump / UK Good Deals) its employees, agents, members and the advise / tutorial poster from all liability which may arise in respect of personal injury (fatal or otherwise) or damage to your equipment which may occur by following the advice given. You undertake to make no claim against the company (Pro-Jump / UK Good Deals ltd) its employees, agents, members and the advise / tutorial poster notwithstanding that such injury was caused or occasioned directly or indirectly by the act of neglect ,or default of the company (Pro-Jump / UK Good Deals) its employees, agents, members and the advise / tutorial poster.
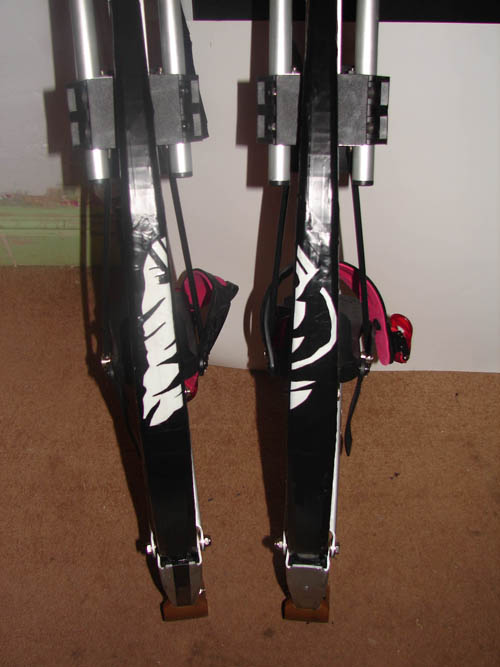
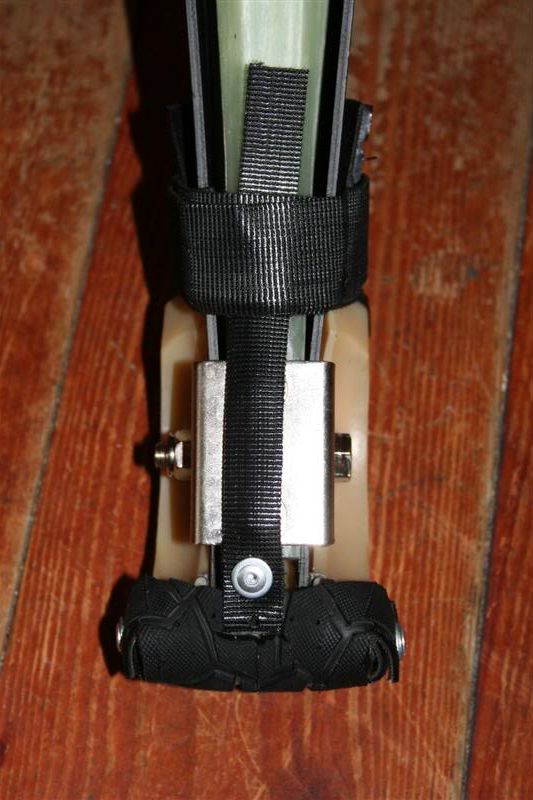
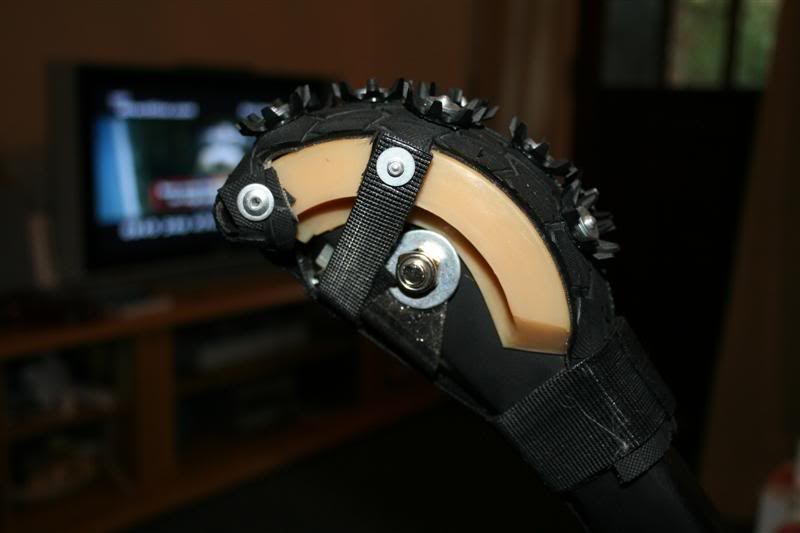
Ricc's Sox
By: Ricc
In late 2007 Ricc developed his own "Tyre Sock" Variation which was based on Jasons Hoofies by by using normal tyres. Ricc made a two versions a "Quick-Sox" and also a cleated versions named the "Grip Sox"
Link to dicussion topic about the "Quick-Sox" can be found here
Link to dicussion topic about the "Grip-Sox" can be found here
Unfortunately there is no detailed tutorial for this but we feel it deserved a page of its own ")
RICC'S QUICK SOX
Link to dicussion topic about the "Quick-Sox" can be found here
ok, firstly. must say its a very similar idea to jason's, so majority of the brain qudos goes to him.
Ive changed mine slightly
- the width fits flush to the width of the hoof.
- rivets have been used.
- an extra strp has been added from front to back to prevent slippage.
In all using rivets makes this job very easy and not very time consuming, you could make a set of them without a template in 30 minutes quite easily.
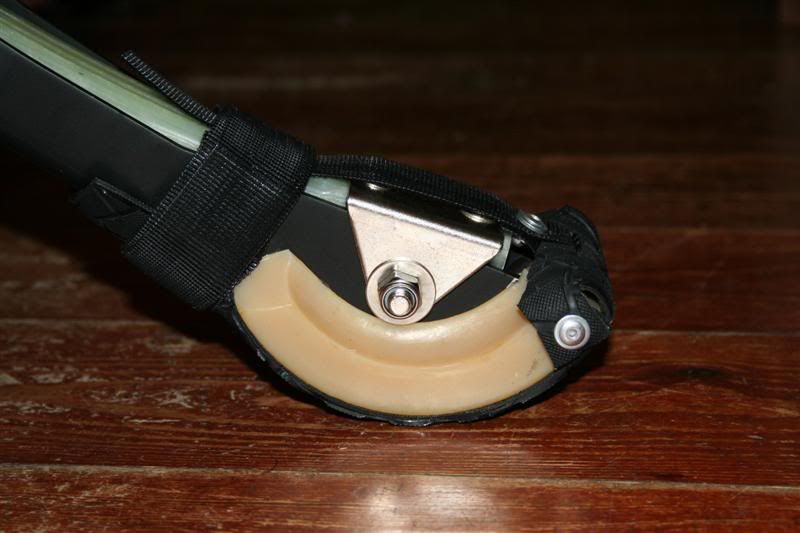
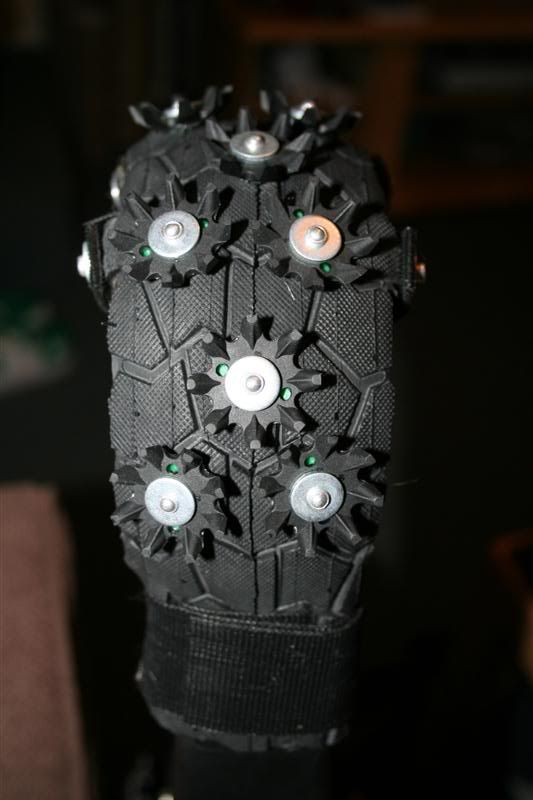
RICC'S GRIP SOX
Link to dicussion topic about the "Grip-Sox" can be found here
My cleated version of my 'Quick-Sox' named "Grip-Sox"
The design was essentialy the same as the quick-sox although a central strap was added to eliminate any sideways movement created my the extra grip of the 'soft spikes black widow' golf shoe cleats.
Back to top of page
* Disclaimer
Any modifications, setting up guides, advice and tutorials found on the Pro-Jump Forum should only be followed at your own risk. Pro-Jump / UK Good Deals Ltd will not be held responsible for any injury, loss or damage of any nature. Some modifications provided on the forum may also invalidate your jumping stilts warranty so please check the terms and conditions on the Pro-Jump.co.uk site or the site where your jumping stilts were purchased from.
By following any of the advice set out on the Pro-Jump Forum you are exonerating the company (Pro-Jump / UK Good Deals) its employees, agents, members and the advise / tutorial poster from all liability which may arise in respect of personal injury (fatal or otherwise) or damage to your equipment which may occur by following the advice given. You undertake to make no claim against the company (Pro-Jump / UK Good Deals ltd) its employees, agents, members and the advise / tutorial poster notwithstanding that such injury was caused or occasioned directly or indirectly by the act of neglect ,or default of the company (Pro-Jump / UK Good Deals) its employees, agents, members and the advise / tutorial poster.